Building a Credenza
These past few years, I’ve slowly been getting more and more into woodworking as a hobby. I decided this year to challenge myself and make a more serious piece of furniture than I had before: a mid-century modern style credenza. I’m really happy with how it turned out. Here are a couple photos of the finished credenza first:
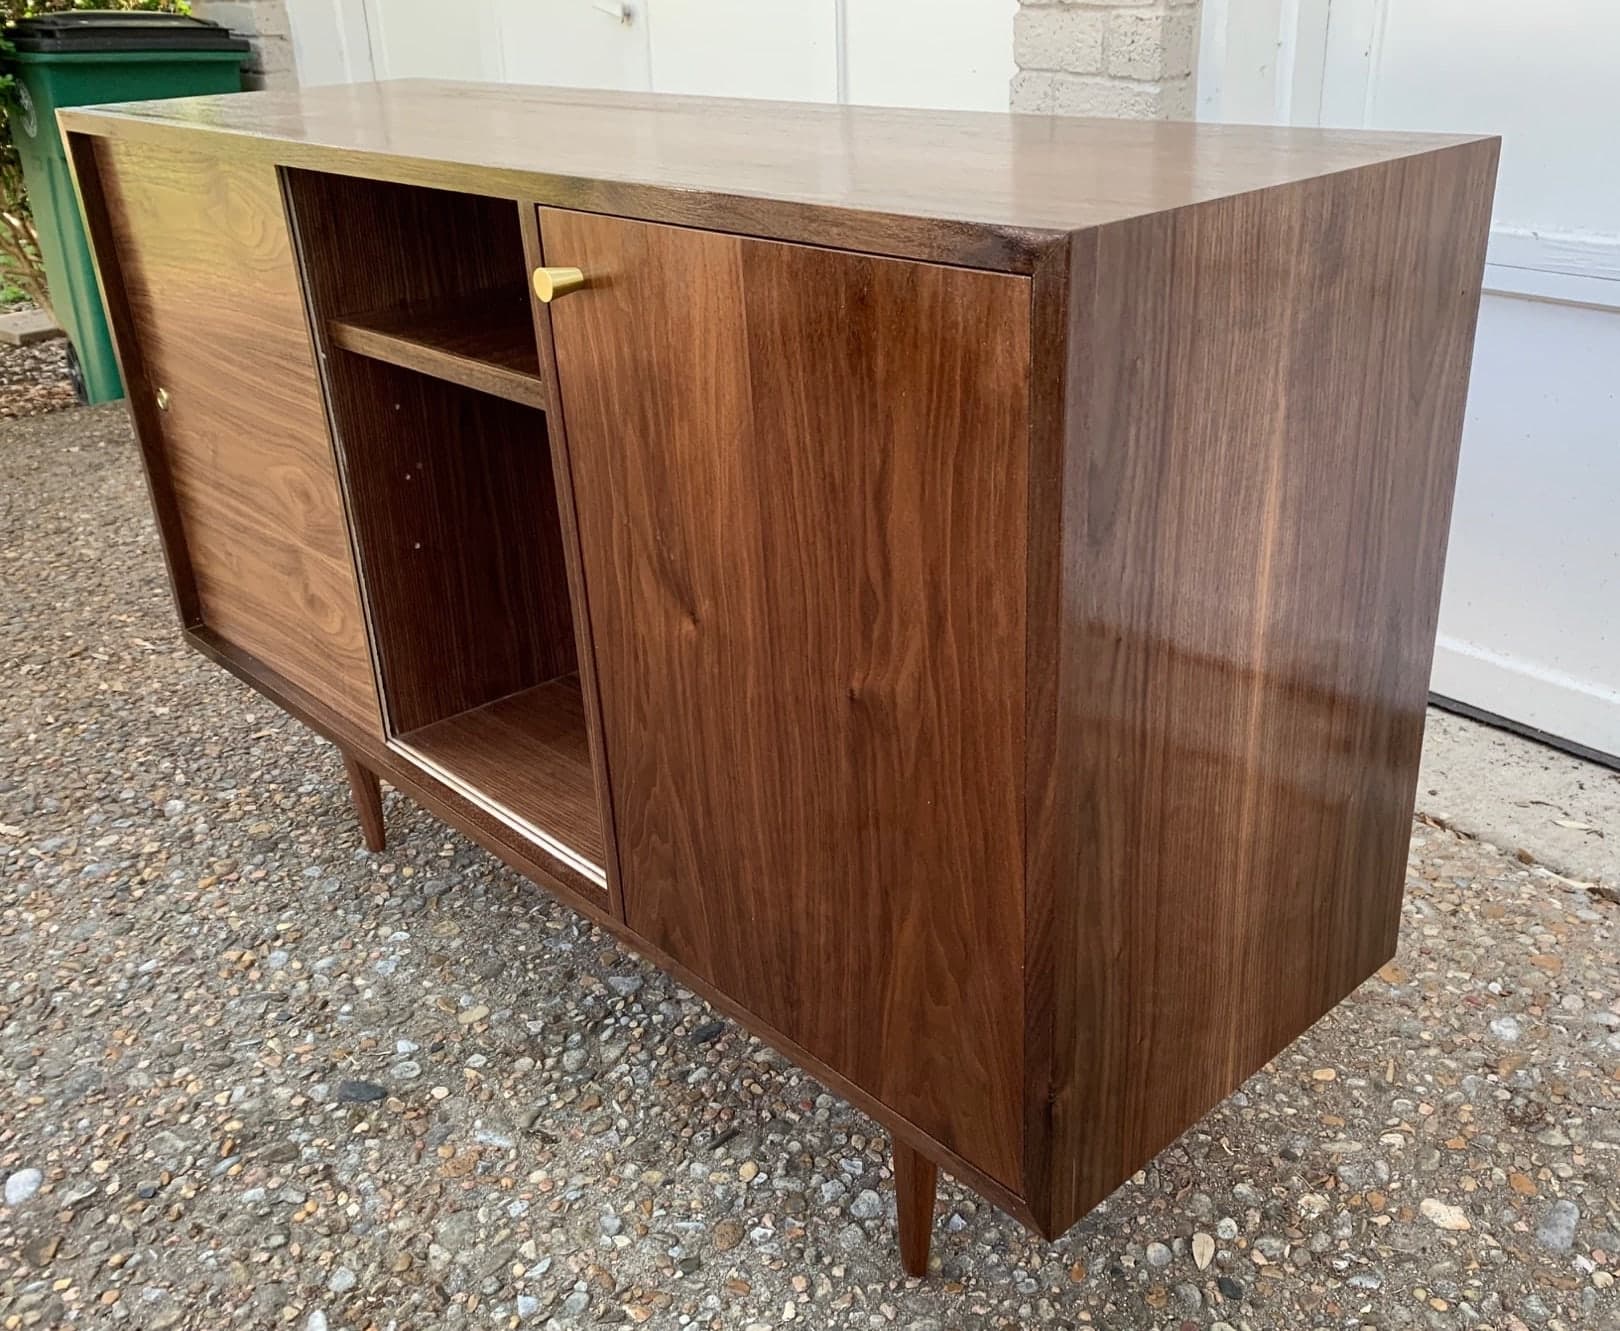
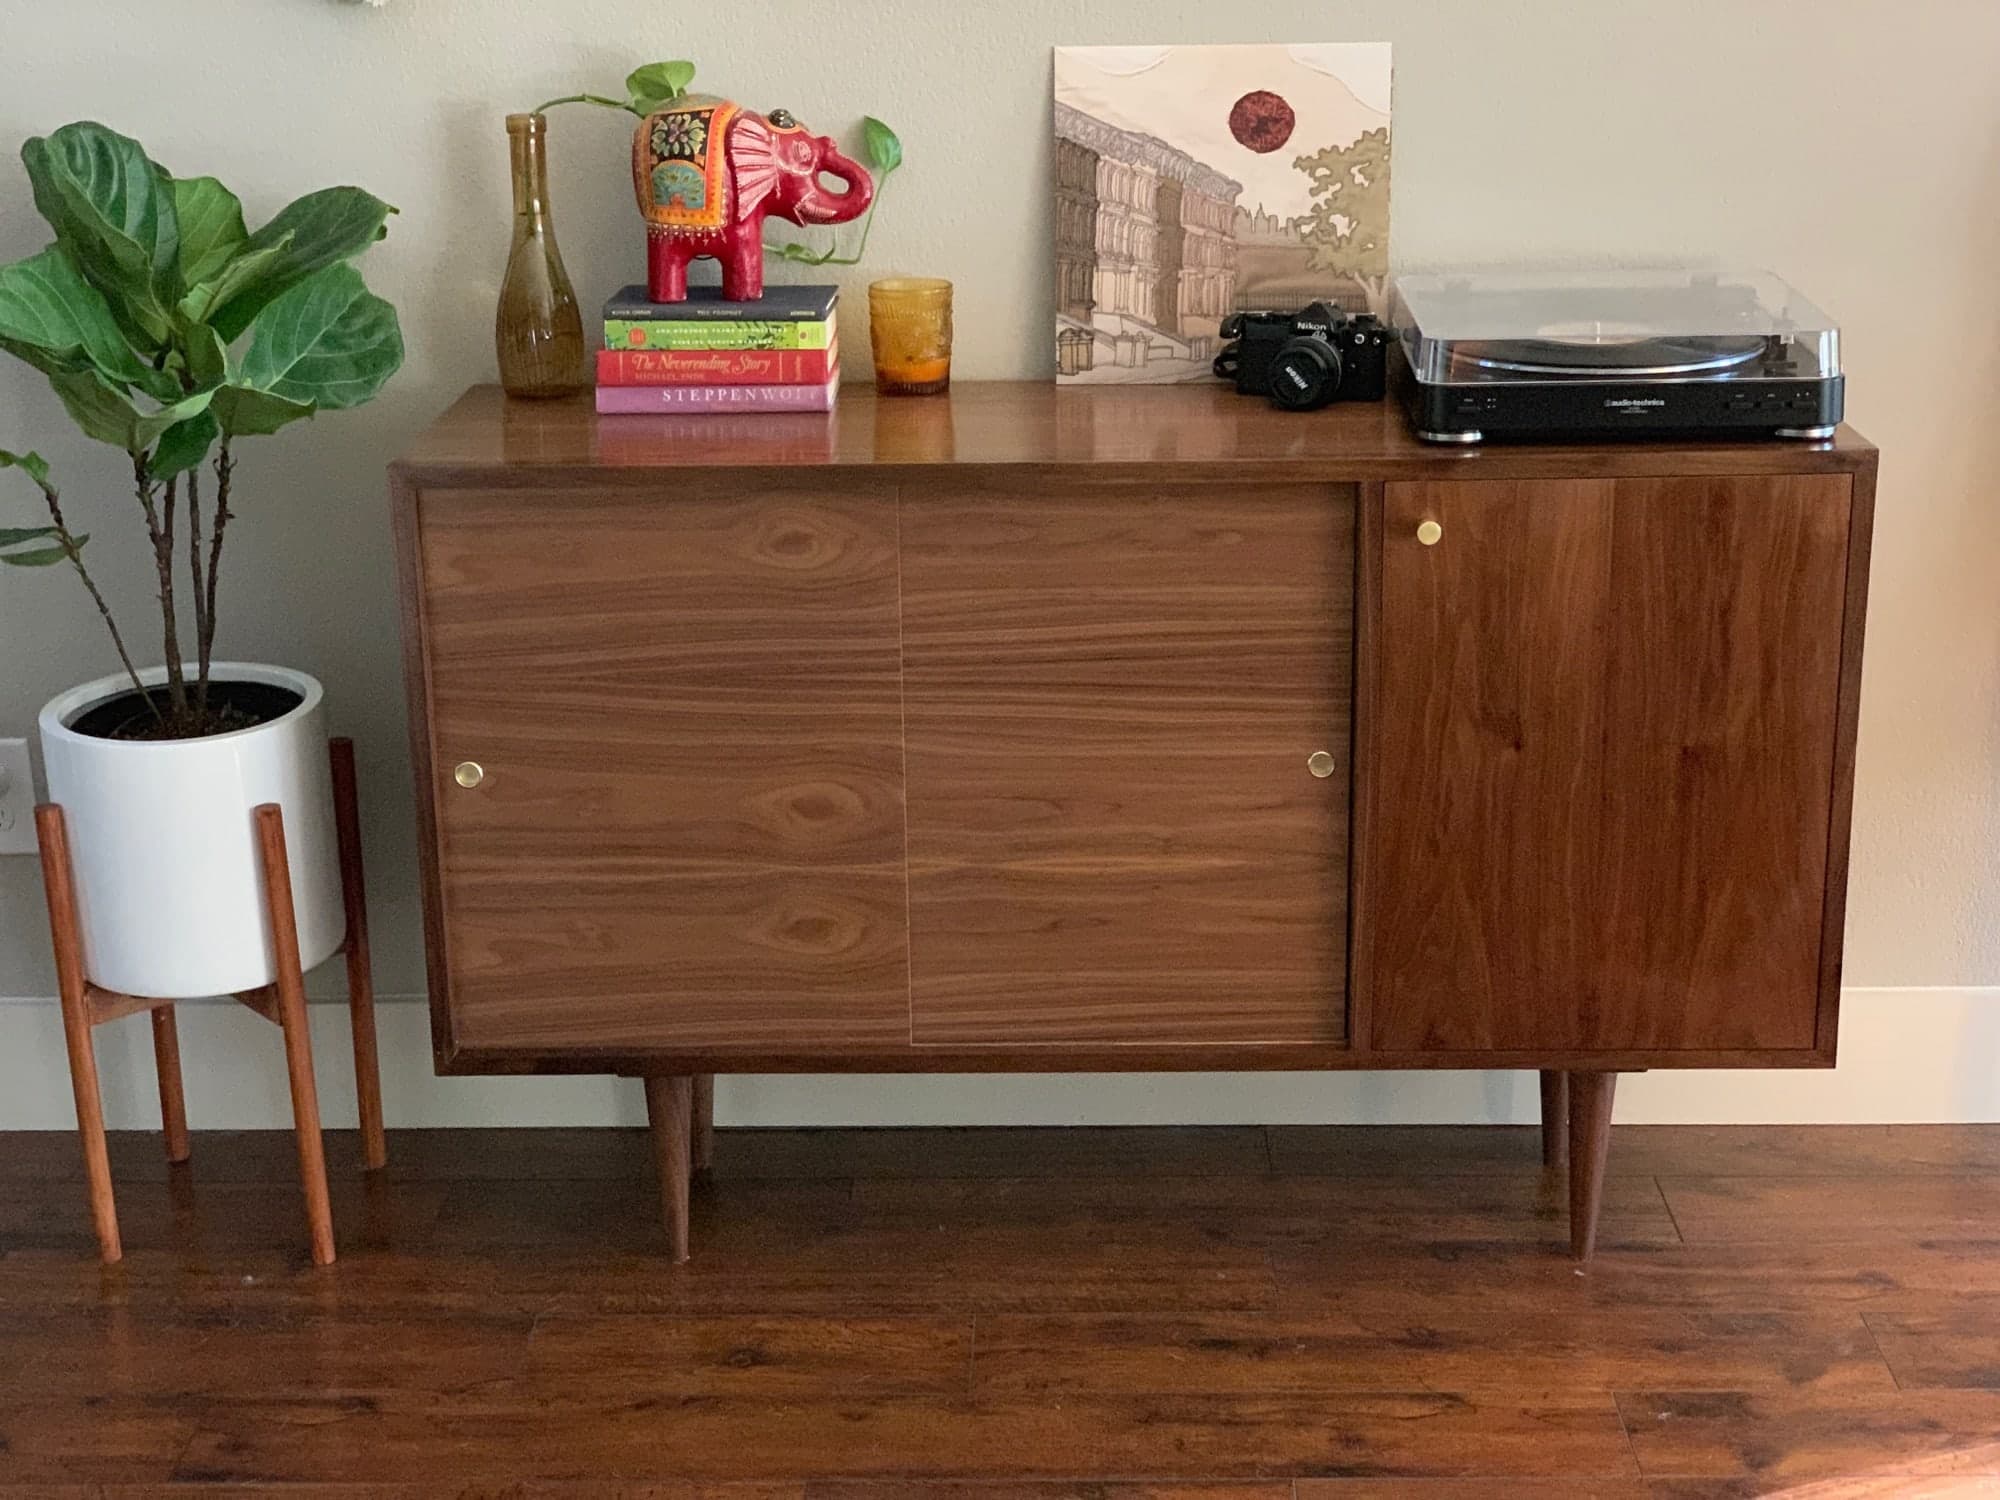
It was a long process getting to the finished piece, full of lots of learning and firsts for me. This is my attempt at documenting it. Let’s get started!
Learning what I don’t know
Before even starting with designing the credenza, I had to fill a big knowledge gap. I had never built anything as complex as I knew this piece would be, so there was a lot to learn. YouTubers like Chris Salamone of Four Eyes and Steve Ramsey of Woodworking for Mere Mortals among others were invaluable for me while I was educating myself.
After watching videos and reading articles on the internet, I decided I would make the credenza out of 3/4” walnut veneered plywood with solid walnut edging on the front of the cabinet to hide the plywood ends. I would use mitered 45° corners where the top and sides meet for a polished look and so I wouldn’t have to worry about adding edging on the sides.
Now that I had a general idea for the techniques I would need and the materials I would be using, it was time to start designing.
Design time!
One of the reasons I decided to build this credenza is that I had very specific dimensions that I was looking for. It was going in a walkway, so I didn’t want it to be too deep, and I had limited space for the width. When determining the dimensions I would use, I also had to take into account what I could achieve using a single 4’x8’ sheet of plywood. Since the plywood would be the most expensive part, and since I wasn’t sure if this project would work out, I wanted to keep it to a single sheet. I started drawing out some designs to get a feel for dimensions that I thought looked good.
I’ve used SketchUp Make for designing several projects now and highly recommend it for planning out these sorts of things. I find it helpful to be able to view my project to scale and then play around with different dimensions to get the look I want. Here’s the design I put together:

And here you can see several iterations where I was tweaking various dimensions. That’s a lot of ZZ plants:

After seeing the designs, taking into account the space where the credenza would go, and checking that I could fit everything on a single sheet of plywood, I decided on my dimensions: 15” deep x 49” wide x 30.5” high. Here’s a rough plan of the cuts from my pocket notebook showing how I would lay them out on a 4’ x 8’ panel (sorry for the quality):

As can be seen above, I wanted the top and sides to come from a single strip of the wood so there would be continuous grain from the sides up to the top.
I also planned to buy a 4’x8’ sheet of 1/4” walnut plywood to use for two sliding doors and for the backing. I would end up with half a sheet left over.
Time to build
Now that I had the design and cuts all figured out, I was ready to get started. I rented a truck from Home Depot and went to Fine Lumber with a friend to help me out and bought:
- 1 4’x8’ sheet of 3/4” thick walnut veneered plywood
- 1 4’x8’ sheet of 1/4” walnut plywood (for the two sliding doors and the backing)
- 6 linear feet of 1”x4” solid walnut lumber

I don’t have pictures of these first couple cuts, but I ripped the plywood into the three length-wise cuts from my cut list using my table saw. Once I had the long 8’ strips, I needed to cut them width-wise. My table saw can only cut pieces up to 24” wide, so I had to cut the pieces for the top and bottom to width using my circular saw. The side pieces were small enough to fit on the table saw. Here’s the box dry-fitted together, with some mineral spirits wiped on to give an idea of what the color would end up like:

You can see above that there’s some tear-out on the edge of the top piece where I had cut with my circular saw. I had figured this might happen since my circular saw is battery powered and has a dull blade. To fix this, I used my router with a flush trim bit to trim about a half inch off each side of the top and bottom pieces, using another straight board as a guide. It’s hard to explain, and this picture doesn’t really help, but you can see that there’s no more tear-out:

It was pretty tedious doing this on both sides of the top and bottom pieces.
Dados, rabbets, and other creatures
Next up was for me to cut rabbets and dados into the top and bottom pieces. I didn’t know these words before I started. A dado is a joint where you cut a notch out of wood so you can fit another piece into the notch. A rabbet is the same thing, except the notch is on the end of the piece of wood.
My plan was to use a router to make the following cuts:
- a 3/4” thick dado for each of the two dividers
- a 1/4” thick rabbet in the back so the 1/4” backing could be installed flush
- a thin rabbet and a groove for the two door tracks (the edge trim would later enclose the front track where the rabbet is)
Hopefully these pictures will help:


I started with the rabbet and groove for the two tracks for the sliding doors.
Routing the track for the sliding doors
There would be two sliding doors made out of 1/4” walnut plywood. My plan was for each door to have its own track, slightly wider than 1/4”. I cut the door tracks by clamping a board down as a guide for the router and using a straight bit. It was somewhat difficult to figure out where to clamp the guide board. I had to measure the distance from the edge of the router guide to the edge of the bit and clamp the board that distance away. Alternatively, it’s not too hard to make some interesting jigs for this sort of thing, which I haven’t tried yet.


The tracks look decent in that picture, but you can’t see my one big mistake. The wood I was using as a router guide moved, and the router went off track:

To fix this, I cut out a small piece of wood (pictured above) and used a chisel to get it to mostly fit before putting it in place with wood glue and wood filler. It’s not very noticeable now:

I routed the same tracks in the top piece as well. One trick I learned on the internet somewhere was to make the grooves for the top of the sliding track deeper. That way, the sliding doors can be removed by lifting them up and then pulling them out from the bottom. Brilliant.
The rest of the dados
Next, I cut the rest of the dados and rabbets for the two dividers and the backing.

Here’s what the bottom and top pieces looked like with the cuts made. You can’t tell so much, but the dados for the dividers were pretty sloppy. I’ve done another project since this one and found it easier to use a top-bearing flush trim bit for dados. I’ll go more into that on my next project write-up.

And here it is with the dividers dry-fit in place:

Gluing on the edging
Next up was to cut out and glue on strips of solid walnut to use as front edging to hide the plywood ends. I ripped the 6’ 1x4 piece of walnut I had picked up into three 7/8” wide strips that were 3/4” thick (the natural thickness of the 1x4):

I glued the edging to the front of the top, bottom, and two sides and used a couple bandy clamps along with lots of tape to clamp it. I was surprised by how much tape I used on this project. When pulled tight, it has a decent amount of clamping pressure for small tasks like this.

I clamped a scrap piece of wood under to help hold the edging almost flush with the bottom:

A couple hours later, the glue had dried, and I used a router with a flush trim bit to cut the edging flush with the boards before sanding it smooth with 80 then 150 grit sandpaper:

Mitered corners
Next up was to miter the four corners of the box so they would fit together at 45° angles. Since the miters hide the plywood where the top and bottom meet the sides, it would keep me from having to put edging all the way around the top and bottom of the credenza. I also like that the mitered corners allowed me to have continuous grain from the top down to the sides.
The top and bottom pieces wouldn’t fit length-wise on my table saw, so I had to cut the miters by standing the pieces up vertically. I made a jig to hold the pieces up perpendicular to the table saw and ran them through on that:


I then ran the side pieces through the table saw without the jig (not perpendicular) and then dry fit everything together. It was starting to look pretty nice!

This next part was a little tedious: I disassembled, cut the dividers shorter, and reassembled repeatedly until the dividers were the right height. It’s almost ready to assemble!
Give up
My project almost ended here, because I got to the next task on my list and thought it said “give up”. Fortunately, I eventually deciphered my handwriting and realized it was time to glue everything up!

I used only glue on the mitered outer corners. The dividers provide most of the load bearing structure of the credenza, and the glue is plenty strong enough for the corners.
The glue I was using dries quickly, so I had to move pretty fast for this bit. I was very nervous since everything was about to come together, and I had no idea how it would go. First, I glued the dividers to the bottom, then I glued the bottom to the side pieces and clamped them at a right angle to the bottom, then I set the top on. I used ratcheting straps to clamp it all together.


You can see one of the sliding doors in this next picture:

Intermission
Quick break to have a baby. My daughter, Wren, was born 36 hours after the photos above. Her middle name might be Credenza.

Door and shelves
After getting back from the hospital and taking a break from all extracurriculars that didn’t involve sleep for a while, I removed the ratcheting straps and filled gaps in the corners with wood filler.
After that, next up was for me to make the three shelves that would go in the credenza and to cut out the cabinet door for the right cabinet. I first made a little jig and used it to drill peg holes for the shelves in all three cabinets:

I messed up the holes at least once with silly mistakes and had to fill them in with wood filler. I eventually got them right. Then, I cut the door to size very carefully. Here you can see the door in place with a couple shelves:

Next, I glued edging on the shelves and routed and sanded them smooth the same way I’d done with the other edging pieces. I used thinner strips of edging here than I used elsewhere.

For the door, if I’d used edging strips, the seams would have been visible from the front. For that reason, I opted to use iron-on walnut edge banding that I found online (not pictured) for the top and sides.
I then installed soft close hinges for the right cabinet door, which was fairly straightforward. I used a 1 3/8” forstner bit to drill recesses in the cabinet and then screwed the hinges to the cabinet and door after measuring very carefully. At this point, I was ready to start finishing!

Finishing
I wanted the natural walnut to be on display, so I didn’t apply any stain. I finished the credenza with three coats of General Finishes Arm-R-Seal gloss urethane topcoat.
Before the first coat, I sanded meticulously with 150 grit sandpaper. Between the second and third coats, I sanded with 320 and 400 grit, respectively. I mostly followed the techniques from this video, applying with cotton cloths and sanding between each coat, then wiping off and applying mineral spirits before applying the urethane. I found the General Finishes topcoat to be fairly easy to apply.
I hadn’t mentioned the legs yet. Since I don’t own a lathe and therefore had no convenient way to taper legs, I opted to buy these pre-fabbed McCobb style legs from tablelegs.com in walnut with an 8” length. They were pretty pricey at $145 (after 20% discount), but they are high quality. I also liked that they come with a cleat for added stability.
Here are the shelves, door, and legs getting the first urethane coat:

I applied a coat to the bottom of the credenza and the tops of the cabinets while I had it upside down and then screwed the legs on:

Before first coat:

After first coat. It’s wild how much richer and darker the wood gets, even with a clear coat:

I waited 12 hours, then applied the second coat:

After final coat and hardware installed – it’s finished!


Cost breakdown
Here’s a rough breakdown of the cost.
| Description | Cost |
|---|---|
| 3/4” sheet of 4’ x 8’ walnut plywood | $130 |
| 1/4” sheet of 4’ x 8’ walnut plywood | $38 |
| 6’ piece of 1x4 walnut lumber | $35 |
| 8” walnut legs with cleats | $145 |
| flush pulls for sliding doors | $5 |
| cabinet door pull (set of 4) | $14 |
| cabinet door rubber stop | $6 |
| cabinet hinges | $12 |
| General Finishes Arm-R-Seal Gloss, 1 quart | $26 |
| polyethylene low friction tape to line the door tracks | $3 |
| TiteBond Premium glue | $6 |
| walnut iron-on edge banding | $17 |
| walnut wood filler | $7 |
| roll of painters tape | $6 |
| Total | $450 |
The wood was a major part of the total cost, along with the legs. I’ve built a TV stand since this project and was able to cut down the cost significantly by using a cheaper wood (birch) and building my own legs. I think the total cost for that was around $150. I’m hoping to do a write-up on that project soon.
I bought lots of other tools and pieces of equipment for this project that I didn’t list above since they aren’t expendable and wouldn’t be required if you already owned them. These things might have totalled up to around $800 for me and included a table saw ($300), router ($200), router bit set, Home Depot truck rental, earmuffs and dust masks, bandy clamps, mineral spirits, tack cloths, sandpaper (I had some grits already, bought others), and chisels, among other things.
I also used lots of other tools and things that I already owned, including a miter saw, circular saw, drill, brad nailer, power sander, shop vac, ratcheting straps, and other smaller tools.
It’s done
This project was an immense learning experience for me, and I couldn’t be more pleased with the result. It was also incredibly difficult. I found myself obsessed, unable to sleep at night during this two month project as I lay awake thinking about what I needed to learn and second-guessing decisions. I was miserable, and I was also alive. I think I’ll do this again.