Building my Backyard Office
When Covid hit in 2020, my company permanently shifted to being fully remote, and, like pretty much everyone, I was suddenly working from home. We had one child and another on the way, and while we were fortunate to have a nice house to live in, I didn’t have a dedicated space to work from. With no prospect of going back to the office, I started thinking about what my ideal working environment would be.
My dream was to have my own office detached from the house. It seemed like this would be less expensive than adding on to the house and potentially something I could tackle on my own. My wife and I ran the numbers on how much it would cost to build an office ourselves and were fortunate to feel that we could afford to do it. But could I actually build an office?
I was intimidated by the fact that I did not have the skills yet that I would need to do the project, and I also knew it would consume our family’s time and energy for several months. For those reasons, despite the urging to go for it from my wife (who might have been ready for me to not be working out of our kid’s room!), it was difficult getting to the point where I was ready to say “I can do this” and pull the trigger. But, in June of 2020, I decided to go for it and got started on the project!
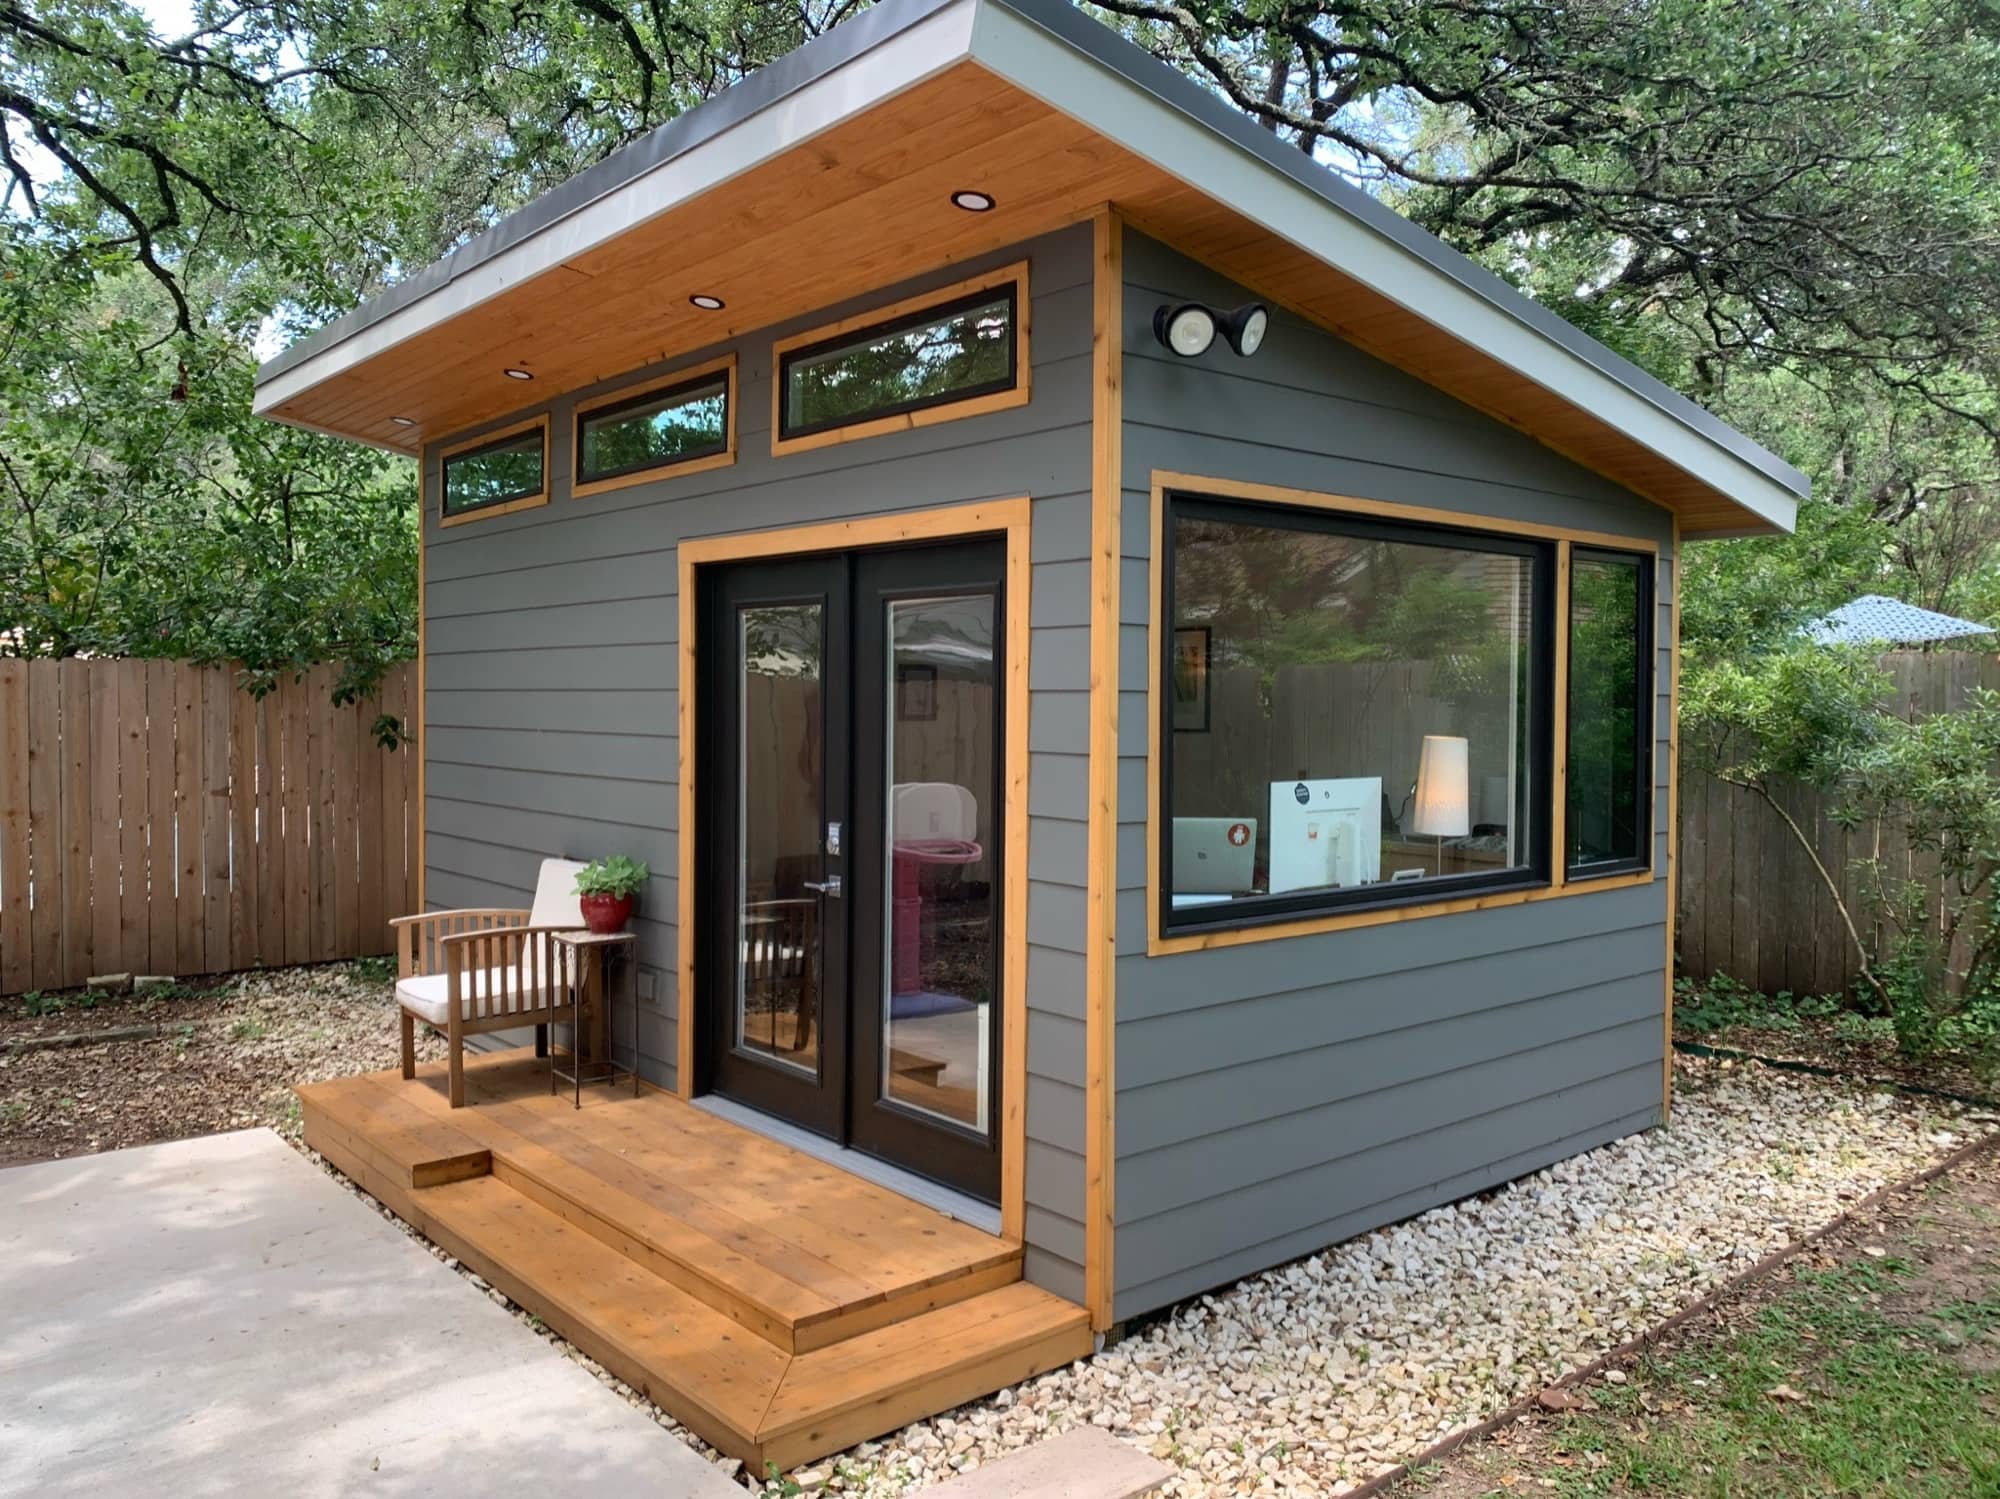
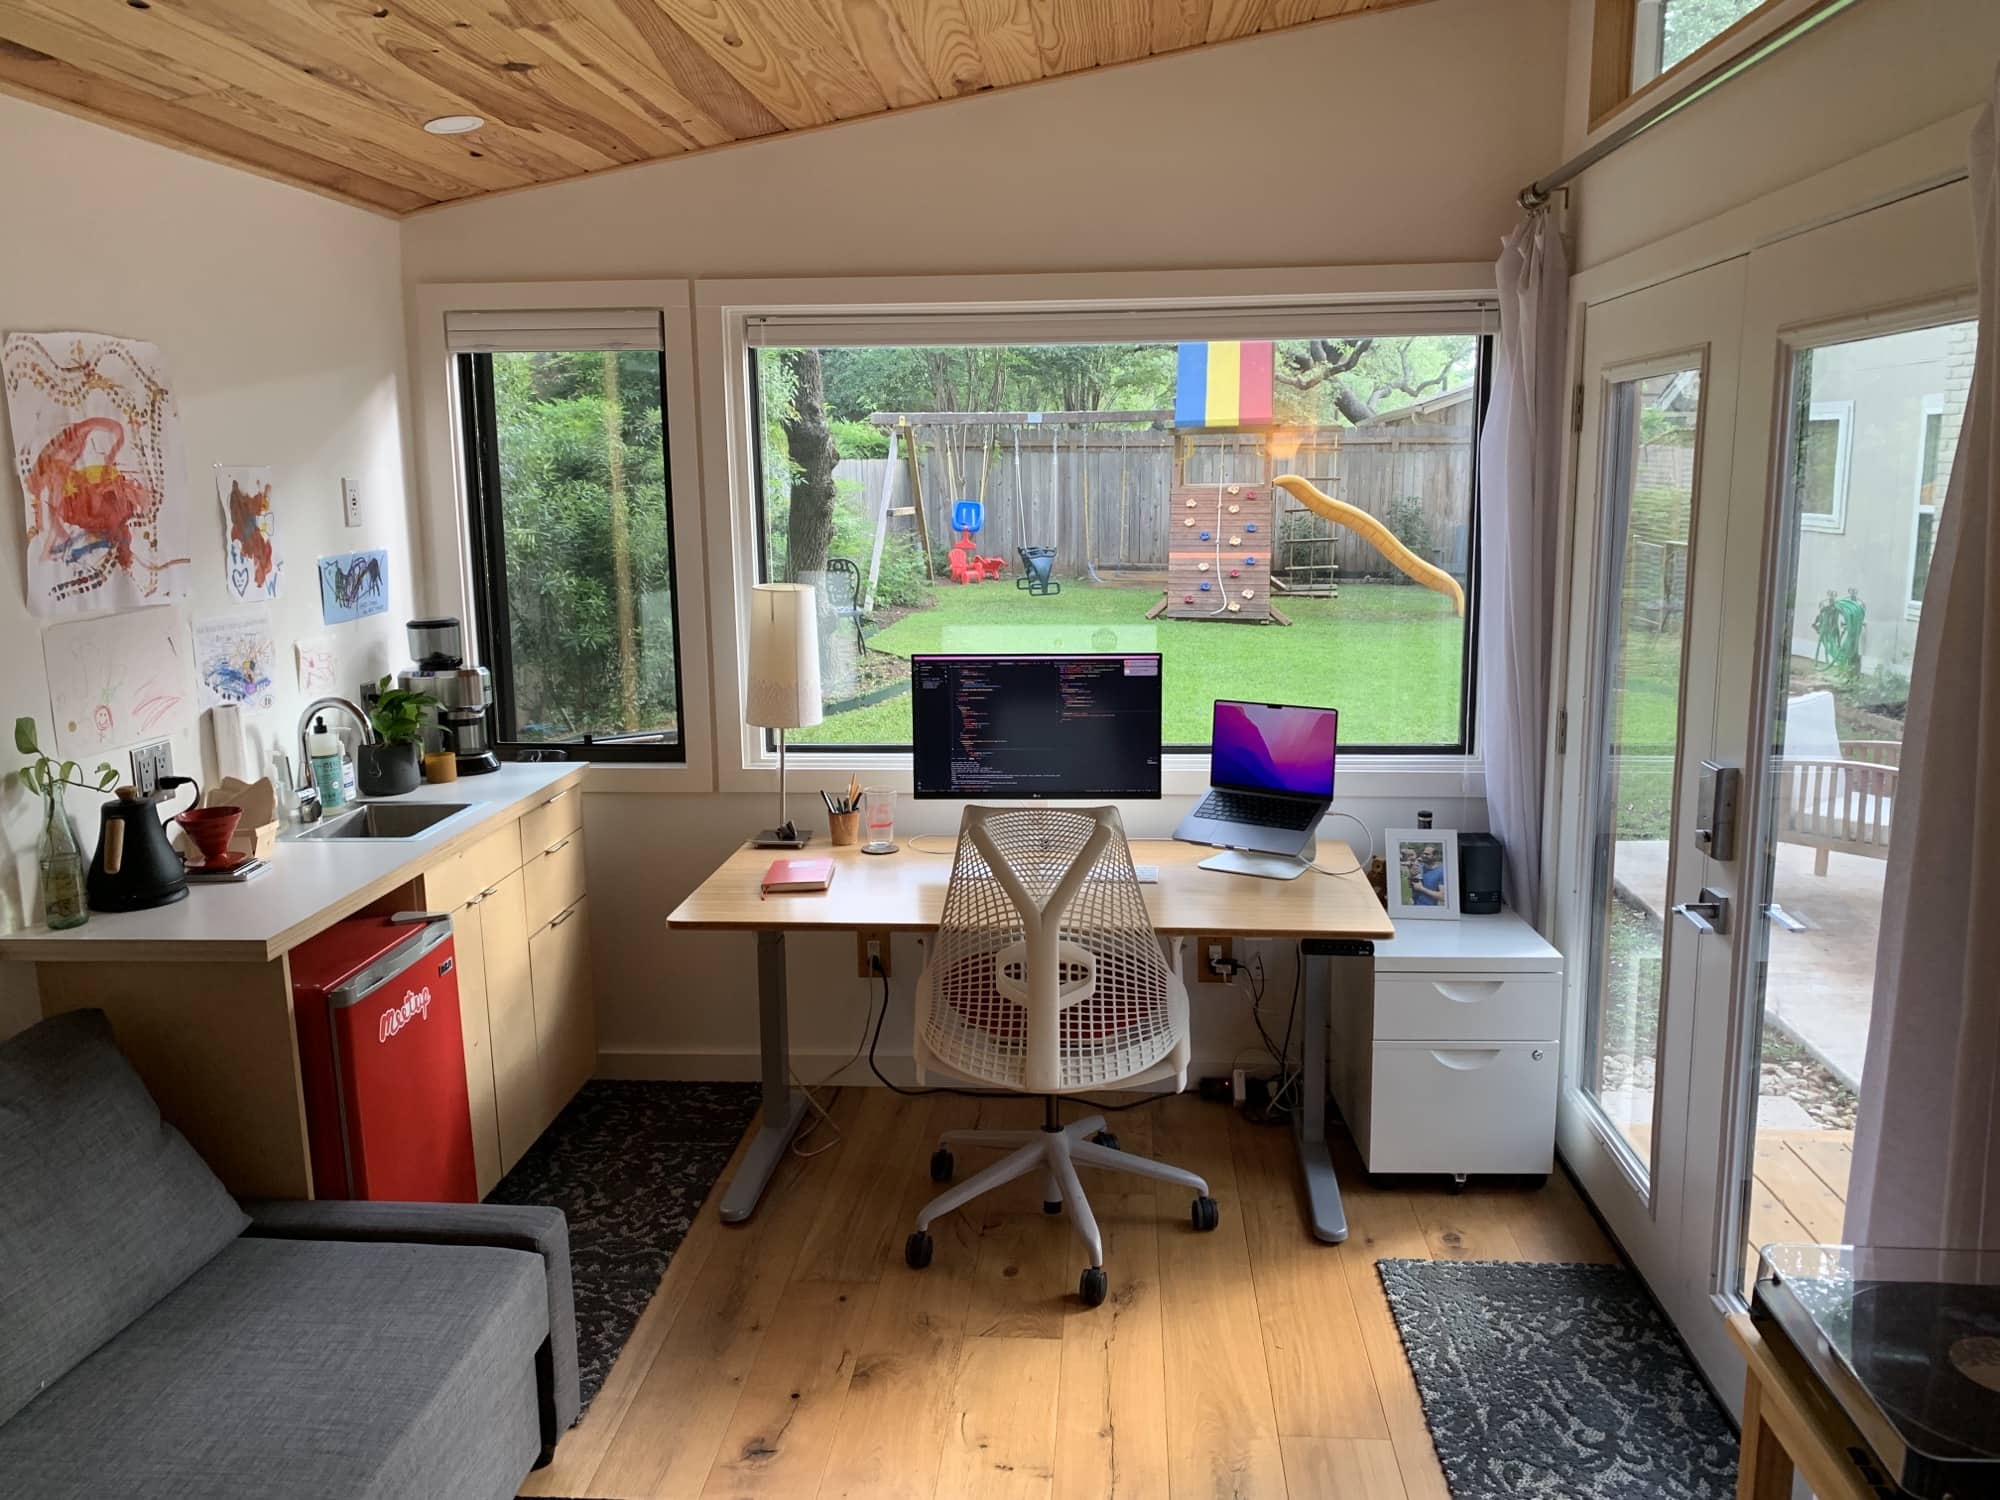
Here are some finished pictures first:
Some preliminary research
I spent a few months researching various aspects of the project prior to starting it. The first step was checking my local building codes. In my city, we don’t have to get building permits for detached structures that are less than 200 square feet, but we do still need to permit any trade work, like electrical or plumbing. Where I am, homeowners can also pull their own permits and do that work themselves.
I then looked up the required property setbacks in our building codes and examined my property survey for boundaries and easements to determine how close to the property lines I could place the office. Where I am, it would have to be five feet from the side of the property, and I have a 7 1/2’ easement at the back of the property for underground electric utilities.
After determining the size and placement of the office, I used my favorite design tool, SketchUp, to design the office. At this stage, I was determining the height of the walls, pitch of the roof, and sizes and locations of windows and doors. I had found a huge window off Craigslist and designed much of the space around that window.
The build
Building the office required me to learn a lot of new skills and do some hard work. I spent the evenings during the week learning and planning, mostly on YouTube and other construction sources, and then dedicated the entirety of most weekends to building the office. My in-laws were a huge help here. My father-in-law helped out almost every weekend with the construction, while my mother-in-law assisted my wife with watching our one year old daughter. I couldn’t have done this project without their support and the support of my wife!
Here are the main milestones of the project:
- June 10: Kicked off the build. Started leveling the ground for foundation
- June 12: Foundation completed
- June 21: All four walls framed and up, mostly sheathed, tarp over top
- June 27: Roof rafters up
- Jul 3: Roof sheathing on, ice and water shield installed, house wrap on
- Jul 14: All windows installed, except on left side
- Jul 18: Roofing installed
- Jul 25: Doors installed
- Aug 8: Trim on corners, door, some windows. Started siding
- Aug 26: Dug trench for electrical
- Aug 31: Most of Hardie Plank siding installed around three sides, two left windows installed
- Sep 6: Bathroom framed
- Sep 7: Electrical sub-panel installed by electrician
- Sep 16: Completed interior rough electrical and passed electrical rough-in inspection
- Sep 26: Finished siding
- Sep 28: Exterior paint complete except for back
- Oct 3: Water line, ethernet run, starting insulation and drywall
- Oct 10: Installed min-split
- Oct 15: Interior tongue-and-groove ceiling complete
- Oct 17: Drywall hung, wood wall complete
- Oct 31: Drywall complete and painted
- Nov 3: Flooring installed
- Nov 7: Interior trim and baseboards installed, furniture moved in
- Nov 9: First day working from office
- Nov 21: Toilet installed and plumbed
- Dec 6: Deck completed
- Jan 1, 2021: Kitchen cabinets and sink completed and installed
I was able to work out of the office just under five months from the day I broke ground on the project. The only work I hired out was an electrician to install a sub-panel on the back of the office.
Photo progress
I haven’t gotten around to doing a detailed writeup about the build, but here are some pictures of the process:


Wrapping up
I have been working out of the office for almost three years now and am so happy I chose to build it. It was a wild and exhausting ride planning and building it, but very worth it. I still enjoy stepping into this space daily and feel the deep connection that comes from pouring labor and creative energy into something.
And now, for symmetry’s sake, I’ll wrap up with the couple pictures this post started with:
Thanks for reading!